Knowledge : 👀
Extension libraries provide a means to register and organise javaScript for use in integrations.Library functions are automatically available for you to drag from the Actions palette to your orchestration integrations.
- Advertisement -
In this blog we will see how to define custom function in OIC and then use it inside our Integration.
Use Case :
Our requirement is to convert date format "20-MAR-95" into this format "20-03-2095". As we don't have any function as of now present in OIC to full fill this requirement , so we will define a CUSTOM FUNCTION (in JavaScript) and later use this function in an Integration.
Approach :
- Firstly, we will register the Libraries that is containing our CUSTOM JAVASCRIPT FUNCTION. Once it get registered , libraries functions are automatically available for us to drag and drop from Actions palette for orchestration Integrations.
- Secondly, we will use this custom function in one integration.
- Thirdly, Testing of Integration.
Lets see the steps in detail :
STEP 1:
In OIC home page , click Libraries icon present inside the left Designer navigation bar.

- Click the Register button in the tittle bar.
Save the below JavaScript code as ""convertDateFormat.js" in your local system :
function convertDateFormat(date){
var monthName = ["None","JAN","FEB","MAR","APR","MAY","JUN","JUL","AUG","SEP","OCT","NOV","DEC"];
var splitDate = date.split("-");
var convertedDate = "20" + splitDate[2] + "/"+ String("00" + monthName.indexOf(splitDate[1])).slice(-2) + "/" +splitDate[0];
return convertedDate;
}
- Advertisement -
- In the Register Library dialog box, click browse to select the above saved file "convertDateFormat.js"
Enter the below details :
*Name : ConvertDateFormat (you can enter any meaningful name)
Description : write some meaningful description & click create.
Description : write some meaningful description & click create.

- The libraries page will open , select convertDateFormat.js as shown in below image

- select XPath , click Save and then close

STEP 2 :
Now let's create an Integration to use above registered custom function "convertDateFormat"


*What do you want to call your Integration? - write some meaningful name
*What can this Integration do? - write some meaningful description

*What do you want to call your endpoint ? : write any meaningful name
*What is the endpoint's relative resource URI ? : write /date
(you can give any meaning full word with "/" )
*What action do you want to perform on the endpoint ? : Select POST
&
Select Configure a request payload for this endpoint
Select Configure a response payload for this endpoint


Authorization : add Basic authorization (enter your OIC userid
and password )
Now let's create an Integration to use above registered custom function "convertDateFormat"
- From the left Designer navigation bar present in OIC home page, click Integration and then click Create
- Select App Driven Orchestration
- Advertisement -

Knowledge : 👀
App Driven Orchestration ? : It enables you to create an integration that uses an event or business object to trigger the integration. In laymen's terms - you have to pass some inputs to trigger the app driven orchestration integrations.
App Driven Orchestration ? : It enables you to create an integration that uses an event or business object to trigger the integration. In laymen's terms - you have to pass some inputs to trigger the app driven orchestration integrations.
Scheduled Orchestration ? : It enables you to create an integartion that uses a schedule to
trigger the integration instead of an adapter. After designing such integration, you can schedule when to run it.
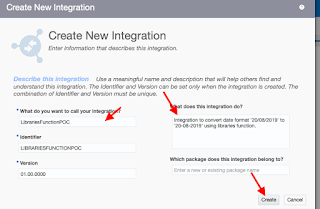
- Enter the below details and then click Create :
*What do you want to call your Integration? - write some meaningful name
*What can this Integration do? - write some meaningful description

- Search for the REST connection name 'RESTConnection' and Select it.
( You can access this blog to configure this REST connection )

- Enter the below details and click Next - [as shown in below image ]
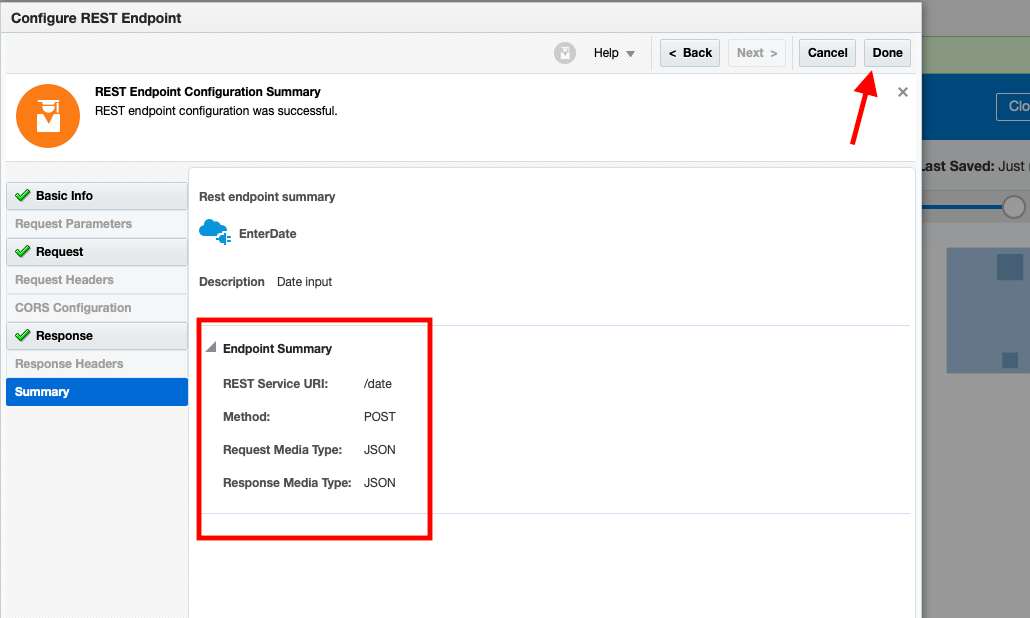
*What do you want to call your endpoint ? : write any meaningful name
*What is the endpoint's relative resource URI ? : write /date
(you can give any meaning full word with "/" )
*What action do you want to perform on the endpoint ? : Select POST
&
Select Configure a request payload for this endpoint
Select Configure a response payload for this endpoint

- Select JSON Sample and then click inline to add request payload [as shown in below image ]
- Advertisement -

- Enter sample JSON → {"Input Date Format" : ""} and click OK and then click Next

- Similarly configure response payload :

- Click Done.
- Open the Mapper by clicking Edit icon.
- Advertisement -

Knowledge : 👀
Map ? : It Enables you to add ad-hoc mappers to the integration.
- Click the icon as shown in below image to see your custom function "convertDateFormat" which we have configured in STEP 1.

- Right click at response column and then select Create Target Node

- Now drag and drop the custom function from left pane inside popup window and then drag and drop the request column inside this function call and then click Validate and then Close.(as shown in below image )

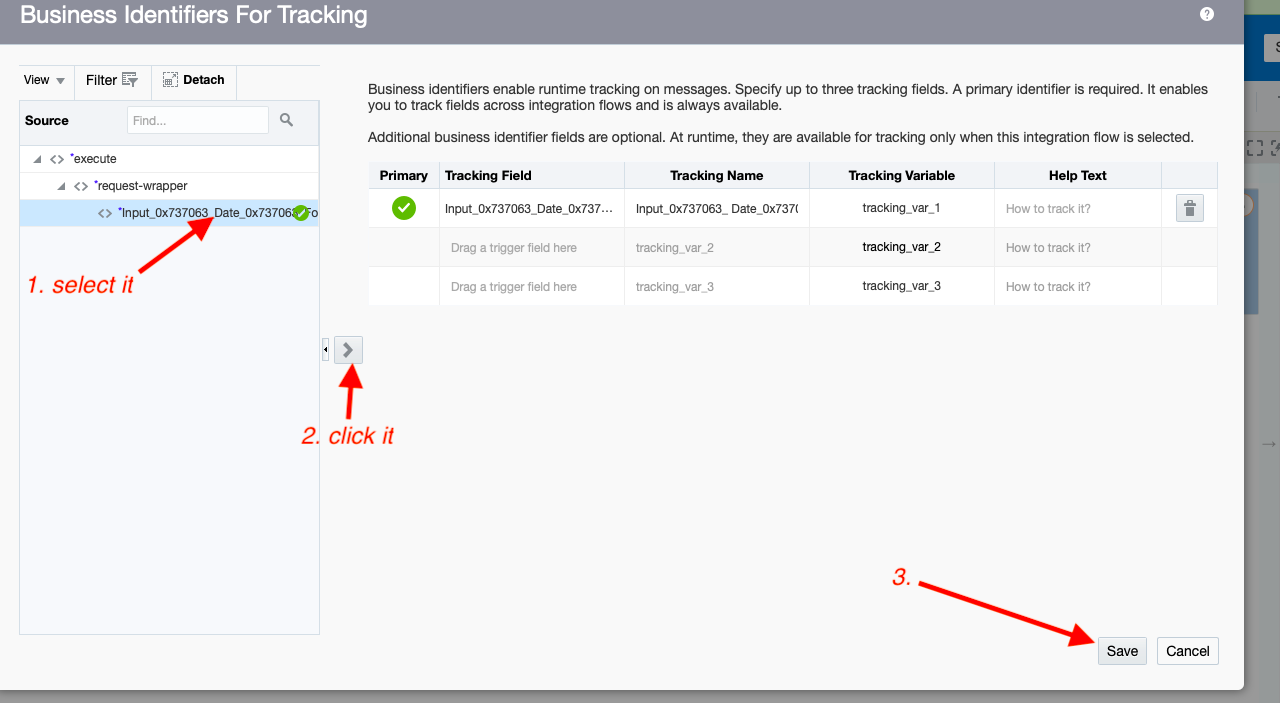
- Enable tracking by clicking Hamburger sign and then click Tracking

- Map the request column as tracking variable and then click Save and Close.
- Advertisement -
Knowledge : 👀
Assigning Business Identifiers for Tracking Fields ? : Business identifiers enable you to track payload fields in messages during runtime.You must assign business identifiers before you can activate an integration.
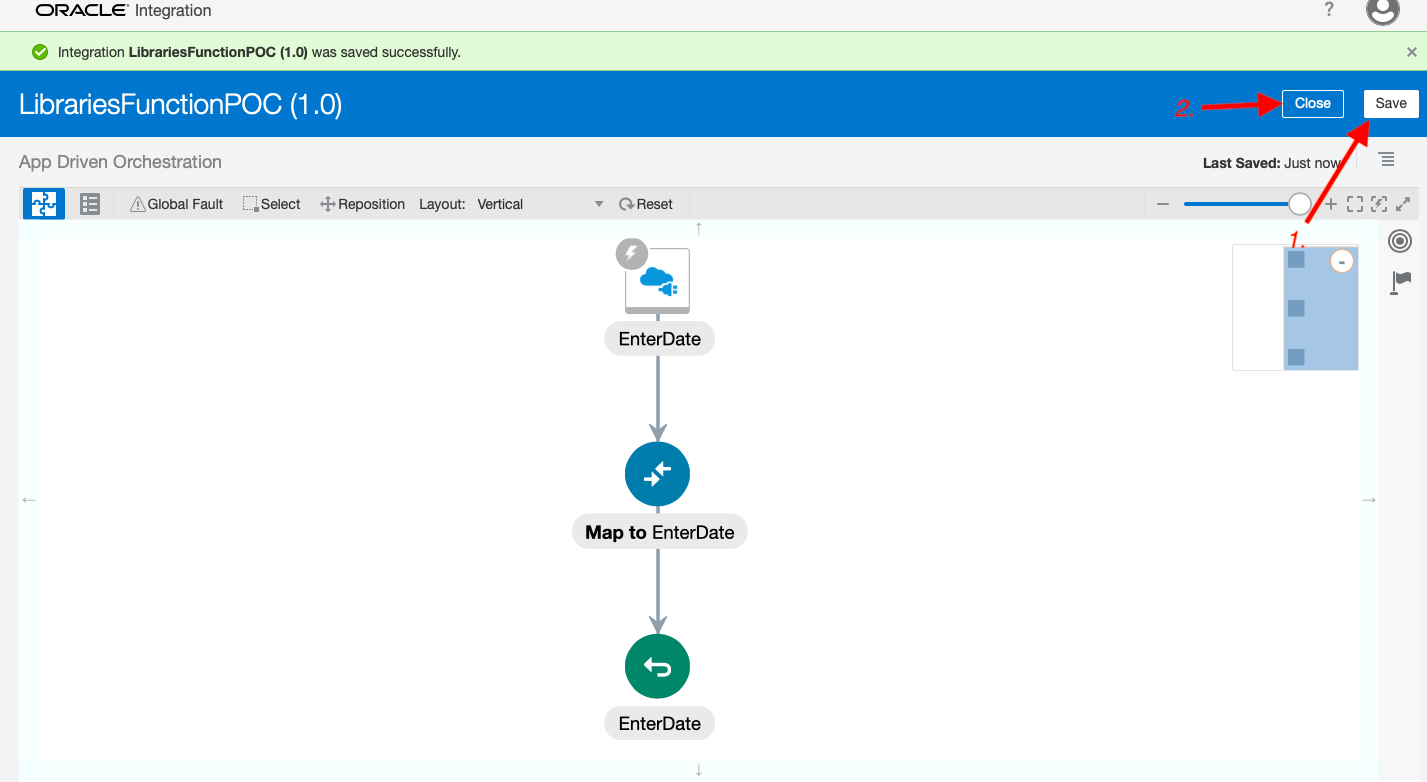
- Click Save and Close. Your Integration is ready to TEST.
TESTING STEPS:
- Activate the above integration


- Click on endpoint URL
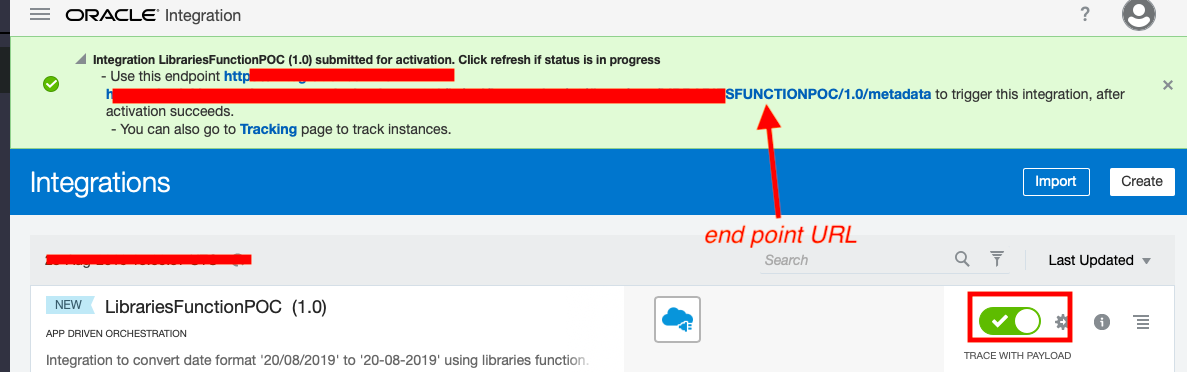
- Copy the endpoint URL

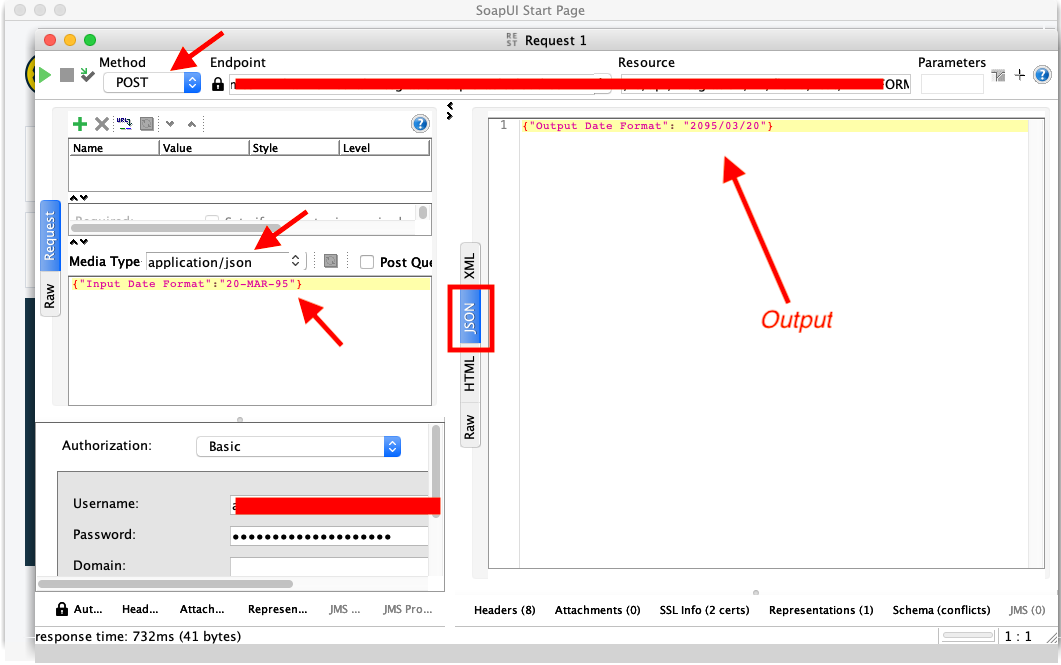
- Now, Open SoapUI tool (5.5.0) to Run the above integration:

Knowledge : 👀
SoapUI? : It is an open source web service testing application.- Click on REST ,Then Paste the above copied endpoint URL and then click OK

- Configure the REQUEST PAYLOAD ( as shown in below image):
Method : POST
Media Type : application/json
- paste below request sample in request payload box
and password )
Click RUN Button , You will see Output in JSON format.
- Advertisement -


