In this article I have tried to explain how we can use Global Variable and Data Stitch Action in an Integration.
About Global Variable : You can create complex and simple type global variables that are available for usage throughout an orchestrated integration (for example, when building an expression in the Expression Builder of an assign action).
User-defined complex type variables are defined based on the WSDLs/XSDs exposed in the integration by the trigger connection and any invokes connection. These variables are then be available throughout the integration for assignment and usage.
About Data Stitch Action : You can incrementally build a message payload from one or more existing payloads with the stitch action. The stitch action provides an editor that enables you to assign values to variables. The stitch action supports both partial and full replacement of the message payload. The stitch action also supports both scalar and complex type variables.
How Data Stitch and Global Variable can help ?
Lets take one case scenario : 👉
Suppose your requirement is to map the response of FTP read operation out of its scope. In this case you can use Data Stitch action along with Global Variable to fulfill this requirement.
Another case scenario : 👉
You can map response from one switch flow inside another switch flow using Stitch Action.
Above two case scenario are just the basic use of Stitch Action & Global Variables but you can perform many complex operation using Stitch Action and Global Variables
You can perform the following complex assignments (operations) on variables (and child elements of variables) with the STITCH ACTION :👀
• Append: Appends at the end of the repeating/unbounded target element, the selected element, or the value. For example, you have an existing purchase order payload containing five lines and want to add a sixth line. The stitch action enables you to append a sixth line to the existing array of lines in the purchase order.
• Assign: Places the selected value/element/attribute into the target element/attribute, overriding any existing data in the target element/attribute. For example, you want to change the current address in an existing purchase order. The stitch action enables you to change the address. You can either map fields individually or copy the address object itself.
• Remove: Removes the target element/attribute from the variable. For example, you have an existing purchase order payload and want to remove the price to enable the end point application to calculate a new price. The stitch action enables you to remove the price. For repeating/unbounded elements, all instances are removed unless a specific instance is selected by index or predicates.
Hands-on Practice :
Lets develop one Integration using global variables and data stitch action :
Use Case : Will use Data Stitch Action along with Global Variable to map FTP read operation response out of its Scope.
**Prerequisite : REST Trigger and FTP Server Connection. If you don't have these connection available in your OIC Instance you can follow the below links and can configure the same.
Step 1 : Create one App Driven Integration.
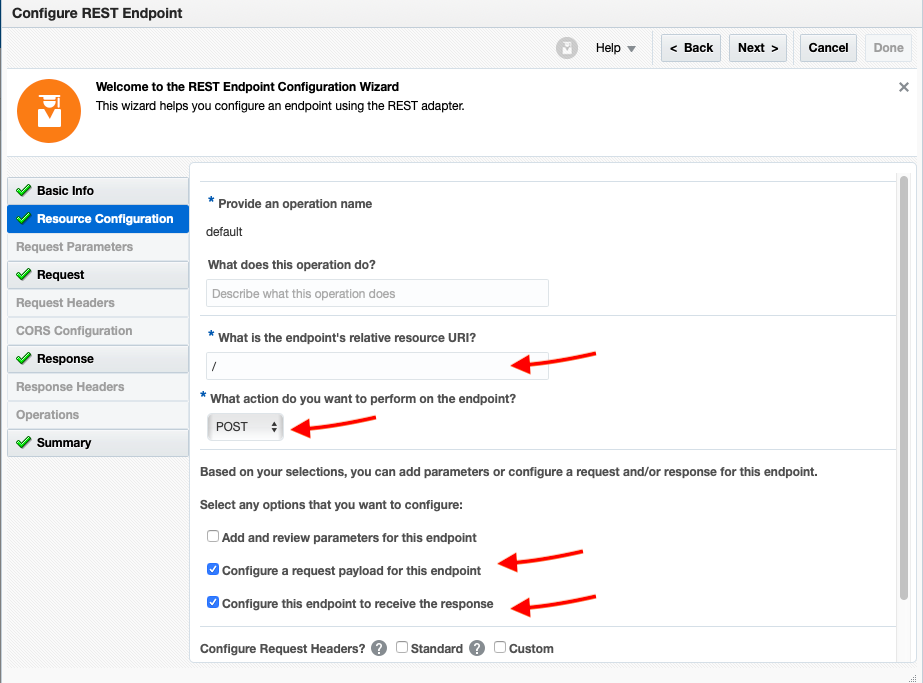
Step 2 : Search for REST Trigger connection and select the it (in my case it's 'REST_Conn') and configure it by providing basic detail along with Request and Response payload.
- Enter any meaningful name
- Enter details as shown in below image and click Next
- Enter below Request Sample JSON Payload and then click Ok.
{
"File Metadata" : {
"File Name" : "",
"Directory Path" : ""
}
}
- Enter below Response Sample JSON Payload and click Ok.
{
"Employee" : {
"EmployeeDetail" : [ {
"Name" : "",
"Id" : ""
} ]
}
}
Step 3 : Add one Scope
Step 4 : Add the FTP Connection. In my case it's "FTP_Test".- Enter operations details and then click NEXT:
- Select Operation : Read a File
- Select a Transfer Mode : Binary
- Select "Sample delimited document (e.g CSV) " option and then click Next .
- Enter the Record Name : Employee (you can give any meaningful name)
- Enter the Recordset Name. : EmployeeDetail
- Select the Field Delimiter : comma(,)
- Charter Set : UTF8
- Optionally Enclosed By : "
- Terminated By : ${eol}
- Select use first Row as column header
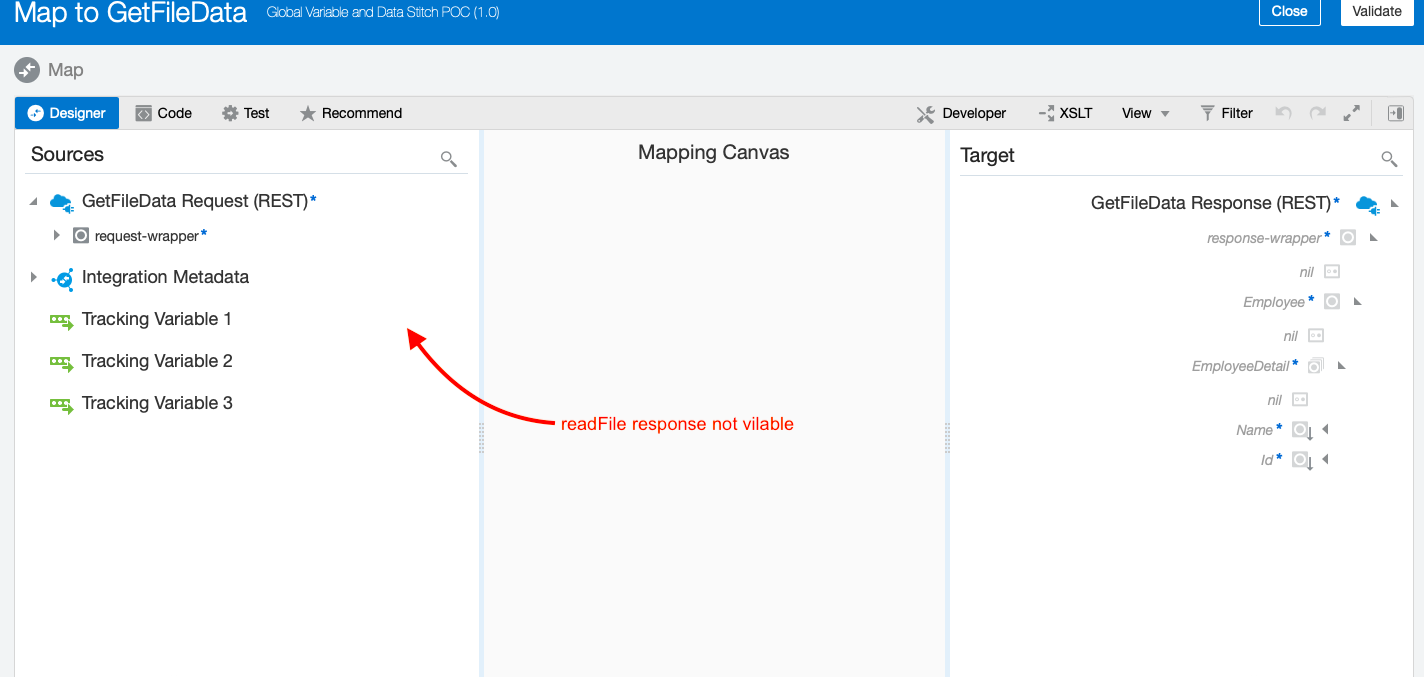
- Open mapper and map the Input with FTP request
NOTE : Now if you open the mapper to map the response of FTP output you can see that FTP response is not available. You Know why ? because FTP adapter is inside a scope.
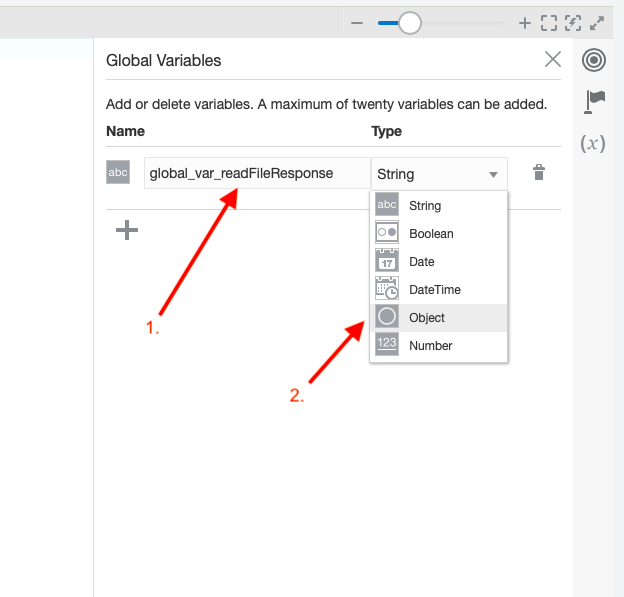
Declare Global Variable and Data Stitch :
- Configure below detail :
- Name : global_var_readFileResponse (you can give any meaningful name )
- Type : Select Object type
- Select "SyncReadFileResponse*" from $readFileFromDirectory as object. And then click close icon(X). It will automatically get saved.
[You can take reference from below image]
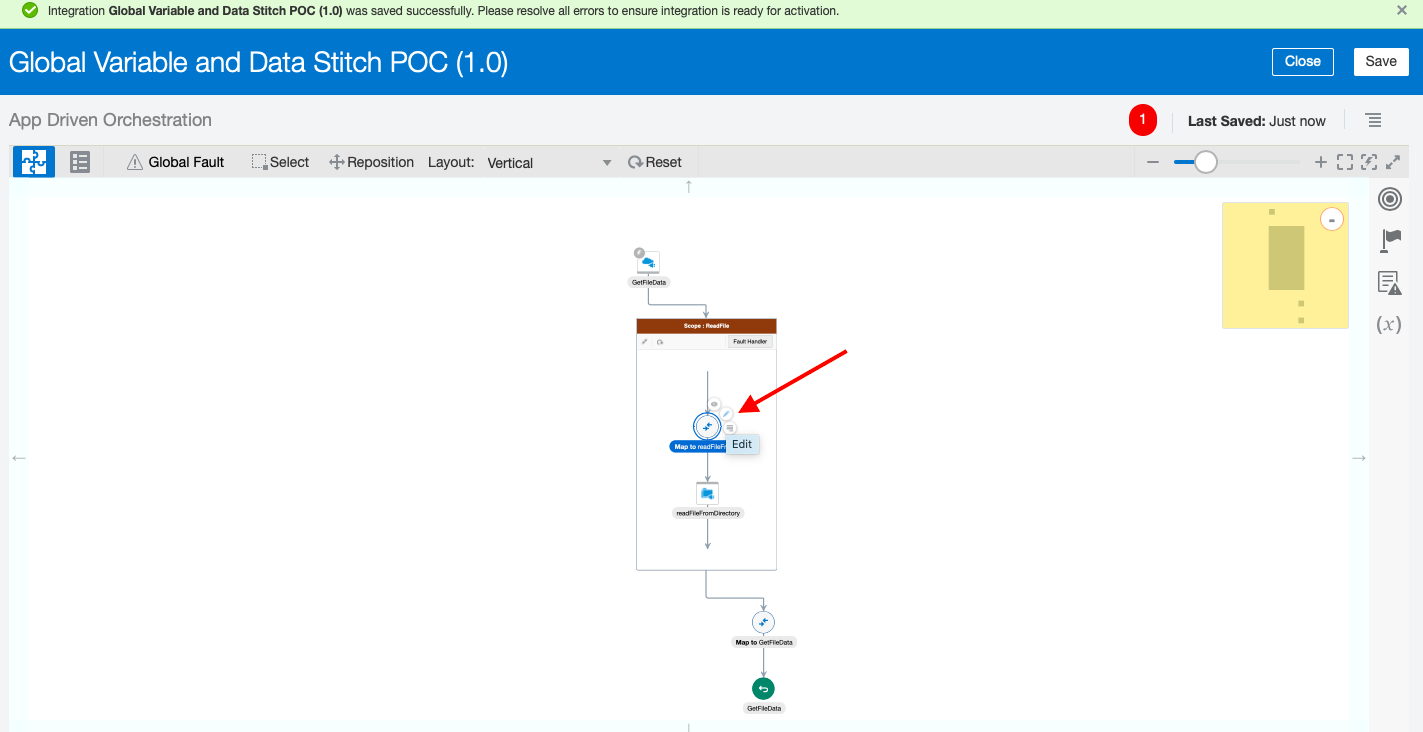
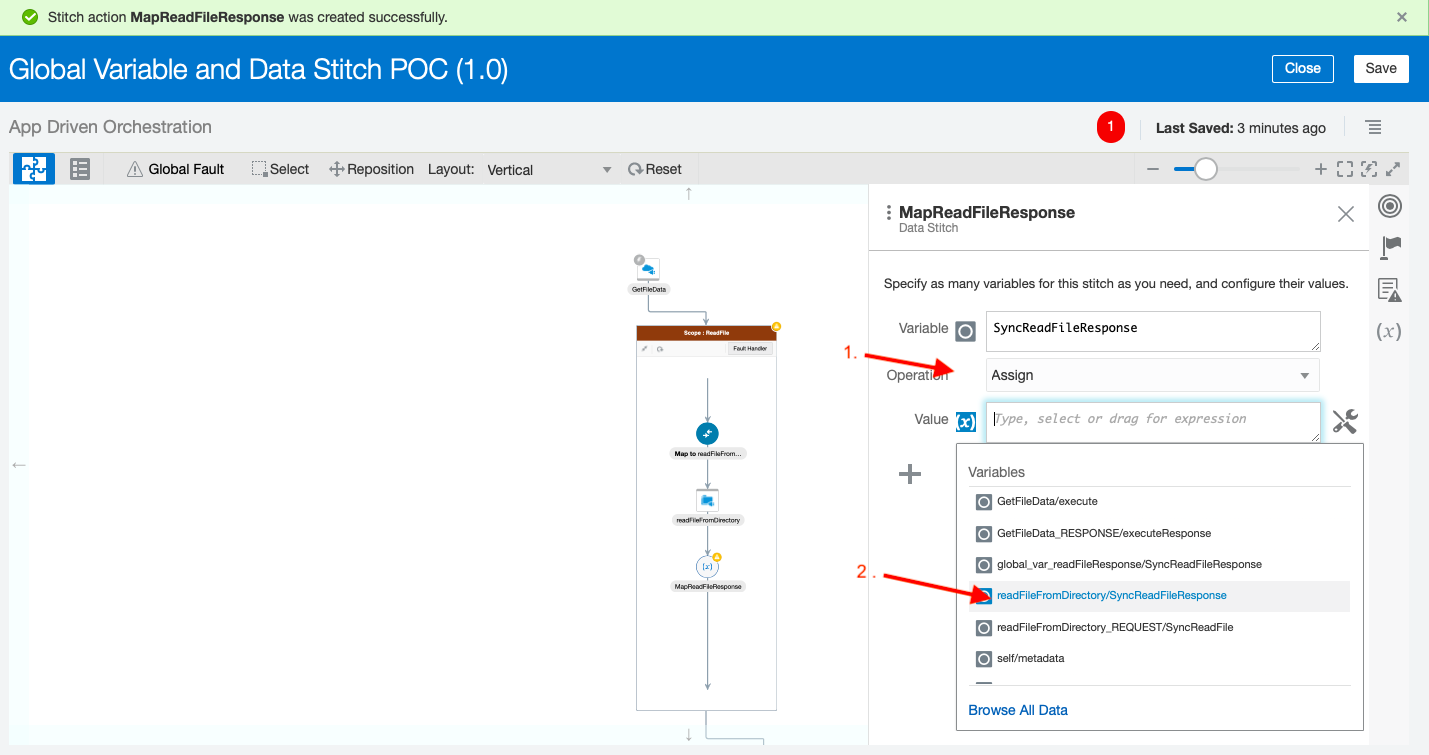
STEP 6 : Now lets add Data Stitch action inside Scope
- Give any meaningful name and then click Configure
- Search for the global variable which we have declared above (Step 5) and then select it.
- Select Operation = Assign and Value (x) = select the FTP response as shown in below image
Knowledge :👀
You can perform the following complex assignments (operations) on variables (and child elements of variables) with the stitch action:
• Append: Appends at the end of the repeating/unbounded target element, the selected element, or the value. For example, you have an existing purchase order payload containing five lines and want to add a sixth line. The stitch action enables you to append a sixth line to the existing array of lines in the purchase order.
• Assign: Places the selected value/element/attribute into the target element/attribute, overriding any existing data in the target element/attribute. For example, you want to change the current address in an existing purchase order. The stitch action enables you to change the address. You can either map fields individually or copy the address object itself.
• Remove: Removes the target element/attribute from the variable. For example, you have an existing purchase order payload and want to remove the price to enable the end point application to calculate a new price. The stitch action enables you to remove the price. For repeating/unbounded elements, all instances are removed unless a specific instance is selected by index or predicates.
- Close the configuration window by clicking 'X'. It will get saved automatically
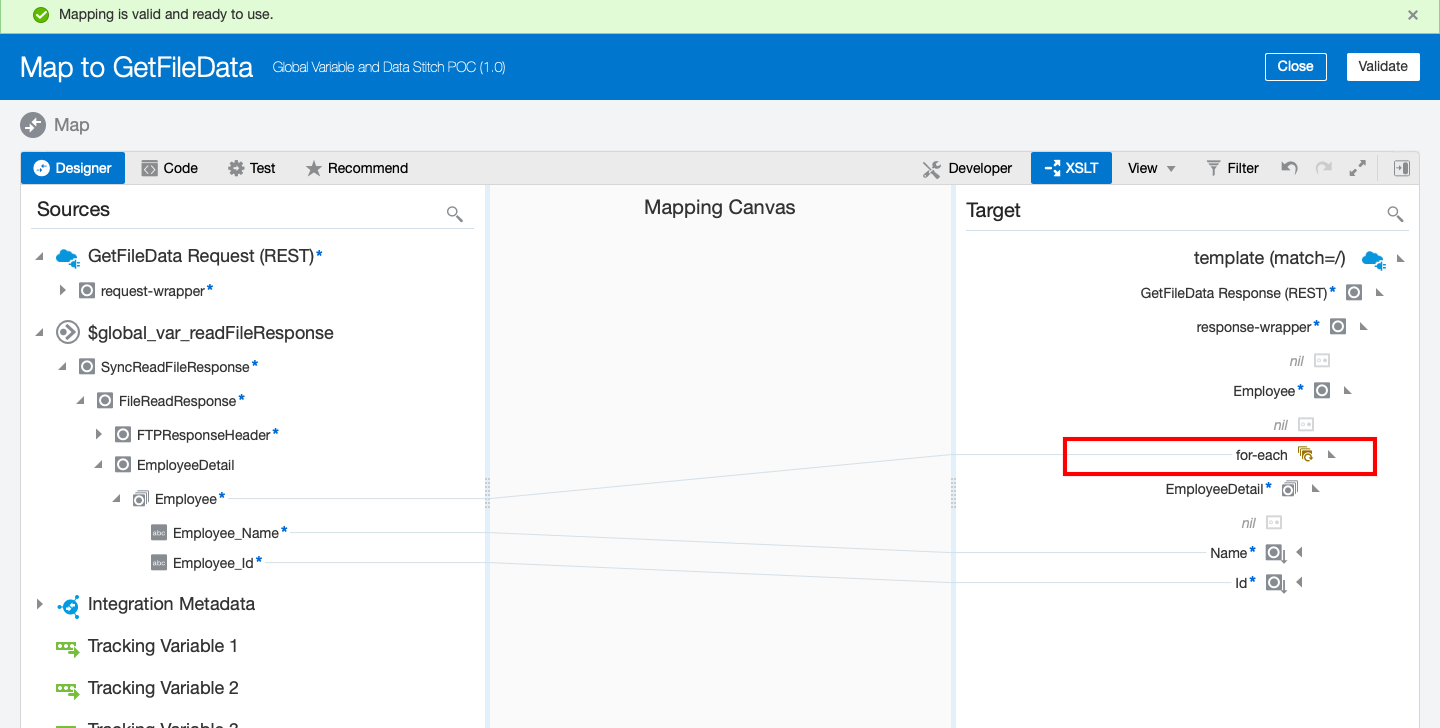
- Now Open the "GetFileData" mapper and map the output with data stitch
STEP 7 : Enable the Tracker
- Click Save and Close the integration.
Testing Steps :
- Put .csv file in your FTP server directory. In my case I am putting file at "/" root directory having file name "DataStitch.EmpDetail.csv"
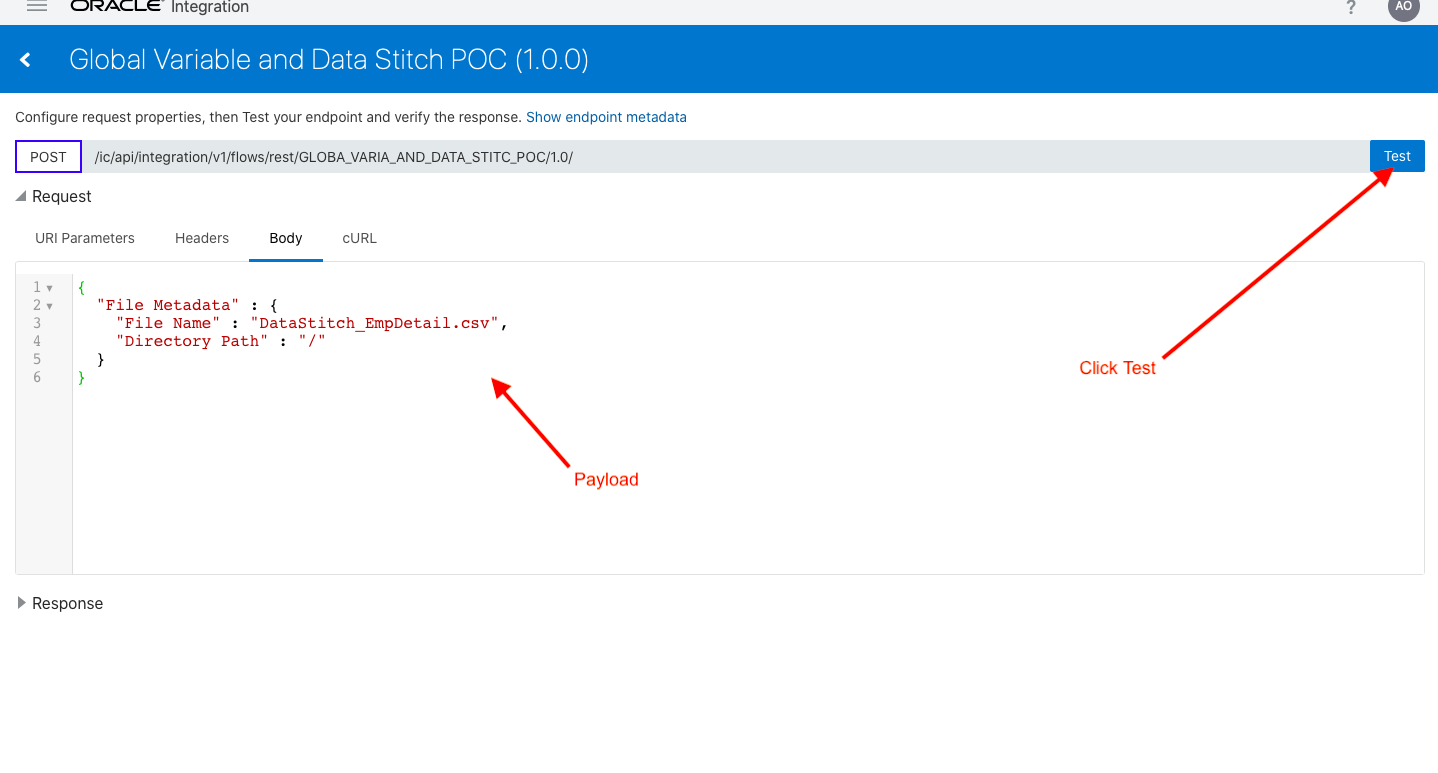
- Enter the request JSON payload by entering your input data. Like Your .csv file name and your file directory path.
{
"File Metadata" : {
"File Name" : "DataStitch_EmpDetail.csv",
"Directory Path" : "/"
}
}
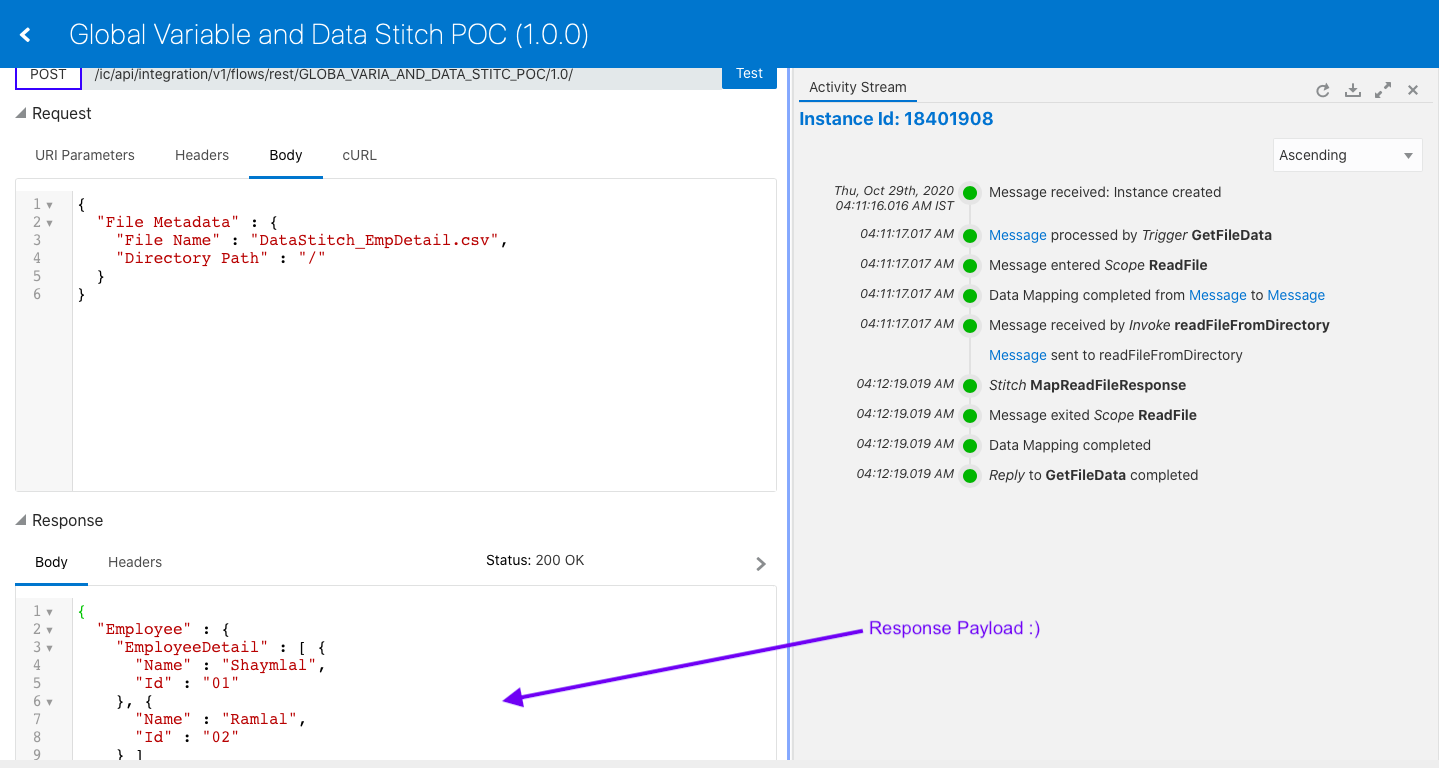
- You can see the output in response window.