' oicbasics: 2022
December 17, 2022

Today's Men and the crime against Women


This article is written by Kabir Yadav, a student, Former Integration Developer at Infosys & Deloitte, Views are personal


In ancient India women choose a man as her husband from a group of suitors (method commonly know as   'Svayamvara'  ) and the unselected man leave the venue without getting offended. As a man they respect the women decision, they don't bind it with their ego or self-respect. Now think can we organize a Svayamvara for a girl today, I think no, because she may be attack by acid from the unselected men 😢


- Advertisement -


December 10, 2022


Buzzword : NATIONAL PARTY 


Recently you may have come to know that AAP (i.e. Aam Adami Party - a political party in India ) set to became the 9th National Party of India after winning 5 seats (MLAs) and securing 13% polled vote share in the Gujarat Assembly Election on Thursday Evening. Congratulations to AAP workers but for me as a curious individual I was quite  interested in the Buzzword - 'National Party'.

So Good morning readers, In this Blog Post I will share my learning regarding 'How a registered party became a 'National Party' in India'.


- Advertisement -


October 29, 2022

Configure REST Trigger Endpoint to Get CSV Data | Integration


In this blog we will see the steps to configure REST Trigger (Source) Endpoint which can receive CSV data as Input from any source system (ex : from WMS System) and do the data processing as require further.


Click to Zoom Out


- Advertisement -


September 22, 2022

Opaque Schema in OIC


Schema  In OIC Schema File (i.e. XML Schema) is used to define the structure of the file which is being used to store data.

Below is an example of an XML schema, or XML schema definition (XSD).

- Advertisement -


September 6, 2022

Schedule Parameters in OIC | Oracle Integration Cloud


Schedule parameters :  

are available across all scheduled runs of an integration and can be used to facilitate processing of data from one run to the next.


For example, when performing batch processing a schedule parameter can be used to track the current position of batched data between runs.


Schedule Parameters : πŸŒŸMaximum 5 variables can be added.


- Advertisement -


June 14, 2022

Check elements detail in HCM Cloud Application | HCM Cloud


In this article we will see the steps to find the configured Elements and its detail (like element input type etc. ) in any HCM Cloud Application Instance.

What are Elements in HCM Cloud Application❓


Elements are components that store data, identify formulas and hold rules for processing values. The payroll process uses elements to calculate pay. You can also use elements to record absences and to capture benefit details. Some elements are predefined. You can also create other elements to match your requirements.


- Advertisement -


May 18, 2022

Migrate Payroll Flows Pattern between Environments | Oracle HCM Cloud


In this article I have mentioned the steps to Import and Export the Payroll Flow Patterns from one HCM Cloud Application Instance to another HCM Cloud Application Instance.
I have motioned the steps for both Individual Flow Migration as well as Multiple Flow Migration.


- Advertisement -


Individual Flow Migration 

If you just want to migrate single flow, you can follow the below steps :

Export Payroll Flow Steps :
  • Sign In to the source HCM Cloud Application environment and navigate to Setup and Maintenance

April 24, 2022

Schedule BI Publisher Report through OIC | Oracle Integration Cloud


In this article I have mentioned the steps to develop an Integration that can invoke "Schedule Report" operation and can check the status of submitted schedule report operation i.e. Job Status.

When to use Schedule Report & when to use run report operation ❓πŸ€”   

  • In laymen term , use 'Run Report' operation if report output size  is <10 MB and use 'Schedule Report' if report content size is >10 MB. Run Report operation can provide the report output in the webservice response but Schedule Report will generate the report output in FTP , UCM etc. ( know as report bursting )


Lets develop the  integration in two parts :

In Part 1 : we will see the development steps to invoke 'Schedule Report' operation and in Part 2 : we will see the development steps to check the Status of 'Schedule Report' operation.


April 21, 2022

Create Schedule Service SOAP Connection | Oracle Integration Cloud


In this article I have mentioned the steps to Create Schedule Service SOAP Connection  that can be use to Schedule BI Publisher Report through OIC.

    • Login to OIC Instance. Navigate to Connections window, Click on Create button (top right) and then Search for SOAP Adapter. Select SOAP adapter and click Select button.

    • Enter any meaningful name for the connection and then click create


    • Enter the below details and then Click Test and then click Save :
      • *WSDL URL : https://<domainname>/xmlpserver/services/v2/ScheduleService?wsdl
      • Security : Select No Security Policy


    • Connection is Active and ready to use in Integrations 


April 14, 2022

Subscribe to HCM Updates ( via ATOM Feed ) | Oracle Integration Cloud


In this Article I have tried to explain HCM Atom Feeds and also have develop one end to end Integration to let you know how you can subscribe to changes made to feed-enabled resources in Oracle HCM Cloud through OIC Integration.


What are Atom Feeds ?
  • HCM Atom Feeds offer a real time mechanism to subscribe to changes in the application
  • Atom feeds enable you to track changes made to feed-enabled resources in Oracle Global Human Resources Cloud
  • For any updates of interest to downstream applications such as new hires, terminations, employee transfers, and promotions, Oracle Global Human Resources Cloud publishes Atom feeds.
  • Oracle Global Human Resources Cloud currently supports creation of Atom feeds for the employees and work structures resources in the following scenarios:

Configure Oracle HCM Cloud Adapter Connection | Oracle Integration Cloud


In this article I have wrote down the steps to create Oracle HCM Cloud Adapter connection in Oracle Integration Cloud.


- Advertisement -


    • Login to OIC Instance, Click on top left hamburger sign and then click Integrations, Click Connections
    • Click Create (Top Left ), Search for HCM Adapter. Select it and then click Create. Enter any meaningful name for the connection, leave the other fields as it is  and click Create.


    • Enter the below details, click Save and then click Test
      • *HCM Cloud Host : Enter your HCM Cloud Host URL
      •   Security : Enter yours HCM cloud user credentials 

March 11, 2022

Get Report Parameters | Oracle Integration Cloud

You can get the Report Parameters by selecting 'getReportParameters' operations of the  Standard SOAP WSDL (ExternalReportWSSService

Lets see the complete steps to get Report Parameters by doing one POC :

Steps Overview :
    • Create SOAP Connection using 'ExternalReportWSSService' WSDL 
    • Then Create a schedule integration using the above SOAP Connection inside which configure the SOAP Adapter to get Report Parameters


Create Connection :  

    • Login to OIC Instance. Click top left Hamburger sign (i.e. Menu icon) , Click Integrations and then Click Connections. Click Create (at top right) and then search SOAP Adapter. Select it. Give any meaningful name to the connection. Click Create
    • Enter the ExternalReportWSSService WSDL URL. Below is the sample URL
                           https://<HCM Host Name>/xmlpserver/services/ExternalReportWSSService?WSDL

    • Enter the HCM User Credentials in the Security section. Click Save. Click Test. Connection is ready to use in Integration


Create Integration : 


STEP 1: Loin to OIC instance, Click the hamburger sign  ,Navigate to Integrations, select Integrations. Create a Schedule Integration by clicking Create (top right)


STEP 2 : Search for the SOAP Connection (ExternalReportWSSService) which we have created above and select it.


    • Give adapter endpoint any meaningful name. Click Next
    • Select operation "getReportParameters' and click Next
    • Leave this window as it is , just click Next
    • Click Done. Adapter configuration completed.

STEP 3 : Open the mapper. Lets complete the required mapping.

    • Pass your Report Absolute path in the attribute name reportAbsolutePath*
    • Hardcode "-1" in the attribute sizeOfDataChunkDownload. That's it. Mapping completed. With these two mappings only you can get Report Parameters Name in response.

STEP 4: Enable Tracking for the Integration.

    • Map the tracking and click Save.
    • Integration is ready to test. Click Save and Close.

STEP 5 : TESTING : Activate the Integration and Run it.

    • Navigate to the Integration Monitoring window and then check the Activity Stream. You can clearly see the REPORT PARAMETER NAMES in the response payload. You can use this response further in the downstream flow of the integration.

March 6, 2022

Worker REST API of Oracle HCM Cloud | Create, Get & Update a Worker

In this post I have tried to explain how we can use CreateGet & Update Worker REST API of HCM cloud with one simple example.


Knowledge :πŸ‘€
You can use Oracle HCM REST APIs to view and manage data stored in Oracle HCM Application Cloud and can be used as a bridge between external applications and oracle HCM Cloud.


Article Overview :

        1. Will create one worker by invoking Create Worker API
        2. after that will get the same worker detail which we created above by invoking Get Worker API
        3. and at the last will update the same worker detail by invoking Update Worker API


Create a Worker 

POST

/hcmRestApi/resources/11.13.18.05/workers

    • Open SoapUI Tool (you can download it from internet). Click on REST icon.
Knowledge :πŸ‘€
SoapUI Tool : SoapUI is an open-source web service testing application for Simple Object Access Protocol (SOAP) and representational state transfers (REST)


  • Paste the Create Worker REST API URI. Below is a sample format of Worker REST API URI and then click OK. 

                    https://<your HCM domain name>/hcmRestApi/resources/11.13.18.05/workers


    • Select Method ='POST' and then add Basic Authorization i.e. Enter user credentials of your HCM Cloud Environment. [check below image for your reference]


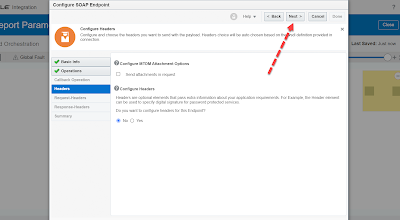
    • For Create Worker operation we need to pass Headers. So lets configure the Headers. Click on  icon 
    • Paste Effective-Of and then click okay.
    • In the value column , paste RangeStartDate=2000-01-01

    • Below is the JSON Payload with minimum columns that need to pass to Create a Worker
Please Note :  LegalEmployerName ,BusinessUnitName and LegislationCode, these element value are application specific. You can't use the same which I have used. So update their value in the JSON payload according to your HCM application and then Paste the payload in SoapUI .


{
      "phones":       [
                  {
            "PhoneType": "W1",
            "PhoneNumber": "9999999991",
            "FromDate": "2020-01-01",
            "PrimaryFlag": true
         }
      ],
      "workRelationships": [      
  {
         "LegalEmployerName": "<!-ENTER VALUE--> ",
         "WorkerType": "E",
         "PrimaryFlag": true,
         "StartDate": "2020-01-01",
         "assignments": [         
{
            "ActionCode": "HIRE",
            "BusinessUnitName": "<!-ENTER VALUE--> "
           
         }
]
      }
  ],
      "names": [      
  {
         "LegislationCode": "<!-ENTER VALUE-->",
         "LastName": "Lal",
         "FirstName": "Chaman",
         "Title": "MR."
      }],
      "addresses": [      
  {
         "AddressLine1": "Near Red Fort",
         "Country": "IN",
         "TownOrCity": "Delhi",
         "AddressType": "HOME",
         "PrimaryFlag": true
      }]
}

    • After pasting the payload, click Run   . You can see the message in the Response window  : 201 Created. Worker Created successfully in the HCM cloud application. Please Note : Copy the Person Number value which you get in he SoapUI response window and save it. We need it later in this article during Get & Update API call.
Create Worker Response Payload


Get a Worker 

GET 

/hcmRestApi/resources/11.13.18.05/workers/{workersUniqID}


Lets fetch the same worker details which we have created above using Create Worker API.
    • Create a new REST Project and paste the below URI
                    https://<your HCM domain name>/hcmRestApi/resources/11.13.18.05/workers


    • Add the Basic Authentication same as we did above (in Create Operation). Select HTTPS Method : Get and then Click on icon and add below query parameter because we just need detail of the worker whose Person Number is '100216' (this is the same person number which I have copied above from Create Worker Response Payload)
      • Name : q
      • Value : PersonNumber='100216' (Note :  in my case it is 100216, you have to enter value which get generated in your case during Create Worker API Call)
Knowledge :πŸ‘€
  • If we don't pass any query parameter , we will get all worker details in the response payload.
  • To decrease the size of the resulting payload, specify which attributes should be returned by using the fields parameters :  GET   
        https://<your HCM domain name>/hcmRestApi/resources/11.13.18.05/workers?fields=PersonNumber


    • Click Run  and then click JSON tab to see the response payload.

    • If you want to see the complete details of the worker i.e. its child elements also, then we need to add one more parameter. We have to add 'expand:all' parameter Then click run button  
        • Name : expand
        • Value : all

    • You can see in above image, this time we get all the child elements also in the response payload. This way we have successfully tested GET Operation. Now do one thing expand the addresses element and copy 'href' URL from its links. We need this later for UPDATE operation.


Knowledge :πŸ‘€
Self Link (i.e href url used above) is used to get access to a specific resource. You can use Self Link to get specific attributes of a child resource

Example : GET
https://<HCM Domain        URL>/hcmRestApi/resources/11.13.18.05/workers/00020.....908/child/addresses/00020000000EACE...00?fields=DisplayName,FirstName,LastName;assignments:JobId,DepartmentId


Update a worker

PATCH

/hcmRestApi/resources/11.13.18.05/workers/{workersUniqID}


Now lets try to update the same worker details which we have created above (i.e. Person Number : '100216') using UPDATE WORKER API. Lets Update its Addresses - "AddressLine1" value. Currently its value is " Near Red Ford (check below image ), will update it to "Near India Gate"


    • Create a new REST API Project and Paste the copied 'href' url (address element href) which we have copied above from Get operation Response payload. So now you can ask - why that specific address href ?? πŸ€”Because our requirement is to update Addresses Element Value. So we need Addresses href. If your equiremnt is to Update Name, you need to use Name Href URL for update.


Sample href URL :  https://<HCM Domain        URL>/hcmRestApi/resources/11.13.18.05/workers/00020.....908/child/addresses/00020000000EACE...00 


Knowledge :πŸ‘€

To Exclude all links from the response payload , you can use onlyData parameter. It can help you to reduce the size of  retrieved message :
GET
https://<your HCM domain name>/hcmRestApi/resources/11.13.18.05/workers?fields=DisplayName,FirstName,LastName,HireDate&onlyData=true


    • Add the basic authorization and select HTTP method as "PATCH" 

    • For Update operation we need to pass Headers. So lets configure the Headers. Click on  icon and Paste 'REST-Framework-Version' and click ok

    • Now enter 4 as its value.

    • Similarly add the below two headers and its value (take reference from from below image)
Header   : Effective-Of 
Value    : RangeMode=UPDATE;RangeStartDate=2020-01-01;RangeEndDate=4712-12-31

Header   : Content-Type
Value    : application/vnd.oracle.adf.resourceitem+json


  • After that lets pass the data which we want to update. In my case I am updating AddressLine1 of Addresses.  So lets passes the Updated value (as below) in the payload and then click run  

 {
     "AddressLine1":"Near India Gate"
  }


    • You can clearly see the Update is successful. AddressLine1 value updated to "Near India Gate" which was " Near Read Fort" earlier.

To cross check the Address got updated or Not, you can run the Get Worker API for the same worker again and check the AddressLine1 Value πŸ˜€


For Further detail, you can check Oracle Document
February 11, 2022

Steps to fetch Oracle Cloud SaaS Application Certificates | Oracle Integration Cloud

In this Article I have mentioned the steps to fetch external services certificates (ex - Oracle Cloud SaaS Application ) which we can import to OIC instance. Certificate enables Oracle Integration to connect with external services.


Knowledge :πŸ‘€
Certificates are used to validate outbound SSL connections. If you make an SSL  connection in which the root certificate does not exist in oracle integration, an Exception is thrown. In that case you must upload the appropriate certificate. A certificate enables Oracle Integration to connect with external services. If the external endpoint requires a specific certificate, request the certificate and then upload it into oracle integration.


Lets see the steps in details : 

Step 1 : Open the Oracle Cloud SaaS Application( ex - OTM, HCM etc. ) URL in browser. Then click on the Lock Icon πŸ”“ 


Step 2 : Select 'πŸ”“ Connection is Secure'
 

Step 3 : Now click ' πŸ“„Certificate is Valid'


Step 4 : Click on 'Certification Path'


Step 5 : Now please note we need to download the first 2 certification path i.e. DigiCert Global Root G2 & DigiCert Global G2  TLS RSA ...

Lets first download DigiCert Global Root G2 :
    • Select "πŸ—Ÿ DigiCert Global Root "and then click View Certificate
    • Click on Details tab and then click Copy to File

    • Click Next
    • Select Base 64 encoded X.509 (.CER) and then click Next


    • Now select any folder where you want to save the certificate file

    • Enter any Name with which you want to save the certificate file (ex - OTM Root Certificate )
    • Click Next 
    • Click Finish
    • You can see the pop up window with message "The Export was Successful ". This way you can download any Oracle Cloud SaaS application certificate.
    • If you open the folder where you have saved the certificate in above step, you can see a new file with the name given got generated.


Step 6 : Now Similarly by following Step 4 , download the other certificate "DigiCert Global G2  TLS RSA ..."

This way you can download both the certificates which you can upload to OIC instance.


Thank You !
Top