Overview :
In the previous blog ( click to see the blog ) we have learned basics about OIC Connectivity Agent and the steps to install it in a local machine (personal laptop)
Now in this blog we will create an integration to insert records into a database using the installed connectivity Agent.
*Make sure your system is connected with open network.
- Advertisement -
Prerequisite :
- Oracle database 11g XE(Express Edition)software. Access this blog to download the software and to know the steps to configure it in a local machine (your personal laptop).
- Configure OIC connectivity Agent. ( You can Access this blog to configure it. )
High-Level development Steps :
- Create a connection to connect with oracle database.
- Create a scheduled integration.
- select the above database connection and configured it by selecting the operation name and table name.
- Hardcode one message which you want to insert in database.
- Run the integration & submit it.
- Open the SQL developer & verify the record get inserted into the database.
Let's see the steps in detail:
Create Connection :
STEP 1: Select Oracle Database Adapter in create connection panel.

- Enter Connection Name & click Ok.

- Advertisement -
- Now configure the connection properties by adding local database connection details which we configured in the previous blog.
*Host : localhost
*Port : 1522
SID : xe
- Click Ok.

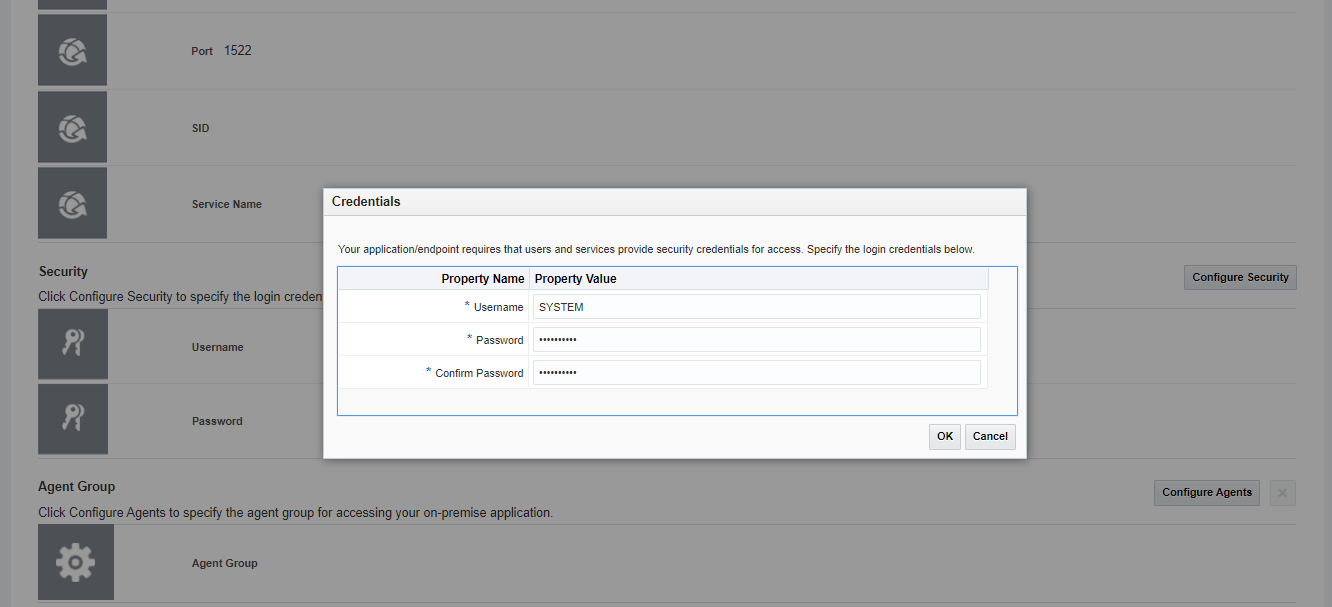
- Now add the local database credentials and then click Ok.
*Username : SYSTEM
*Password : enter the local database password
- Select Agent Group which we have configured in previous blog.

- Click Save , Test and Close.

- Connection is ready to use.

- Advertisement -
Create Integration :

STEP 2:Select the database connection which we have configured above.


- select table "TEST_AGENT" which we have created in previous blog

- Click Import Tables

- Select & declare primary key. Click Ok

- Click Next.

- Click Done.

- Advertisement -
STEP 3: Click to Edit the mapper

- Right Click 'message' tag and click "Create Target Node"

- Hard code any message (ex: "Agent007") & then click Validate and Close.

- Advertisement -
STEP 4: Enable the Tracker


STEP 5: Save and Close the Integration.

- Activate integration and Submit it.

- Advertisement -
STEP 6: Open SQL developer and run the select query , you can see the message get inserted into your localhost database successfully.

- Done.
Thank you.. It's a great blog to learn OIC in detail.
ReplyDeleteThanks :)
DeleteGood Work. Appreciate your sharing knowledge and the effort involved.
ReplyDeleteThank u :)
DeleteThis is such a great article you have, I can reproduce what you've shown and the best part is that it has a lot of screenshot that is extremely helpful.
ReplyDeleteThanks Adhika:)
DeleteHello Kadir, how are you?
ReplyDeleteI read your blog and it's very good, but I'm having a problem with a Basic type integration and I believe you can help me.
In the Pooling Page step, when I select a field of type Date and I want this field to be selected for sending, the page asks for a formatting, but I would like to send the delete value as a sysdate-1 and despite some attempts I could not know how to put the correct format and I get the information below:
Exception Description: Incorrect timestamp format: [SYSDATE] (expected [YYYY-MM-DD HH:MM:SS.NNNNNNNNN])
I tried with to_date(SYSDATE-1,'YYYY-MM-DD HH:MM:SS.NNNNNNNNN')
Can you help me?
I am good dear.
DeleteDefinitely I can help you but Its quite a long query statement 🙂, need to check the code to understand the exact issue, I request you to please share the complete error details ( with screenshot ) as much as you can at 'thekabiryadav@outlook.com'
hiii prnds , i am abhinash hyper model
ReplyDelete